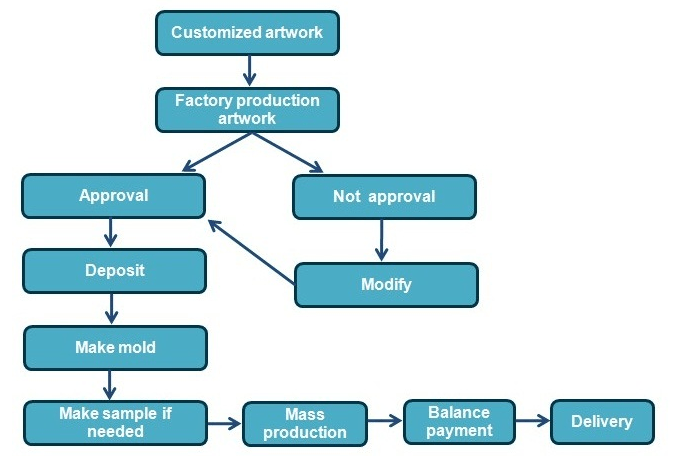
How to customize metal products
- Customizing metal products depends on the specific process and design requirements, here are the general steps that you would typically follow to customize metal products
- 1.Determine the design and artwork that you want to use for your products. This can be done in-house or with the assistance of a graphic designer or artist.
- 2.Select the metal material that you want to use for your products. Common materials include Zinc alloy, brass, copper, and iron. Each metal has different properties that can impact the appearance and durability of your products.
- 3.Choose the shape and size of your products. We can typically offer a variety of shapes and sizes based on your requirements.
- 4.Decide on any additional features that you want for your products such as color fill, antique finish, or custom edges.
- 5.Create an artwork of your products to ensure that it meets your expectations.
- 6.Once the artwork is approved, move forward with the final production order.
- Customizing metal products can be a complex process, so it’s important to work with a reputable and experienced manufacturer who can guide you through the process and ensure that your productss meet your specific needs. We are the supplier you are looking for.
Customizing metal products can be done in several ways.
Here are some common methods:
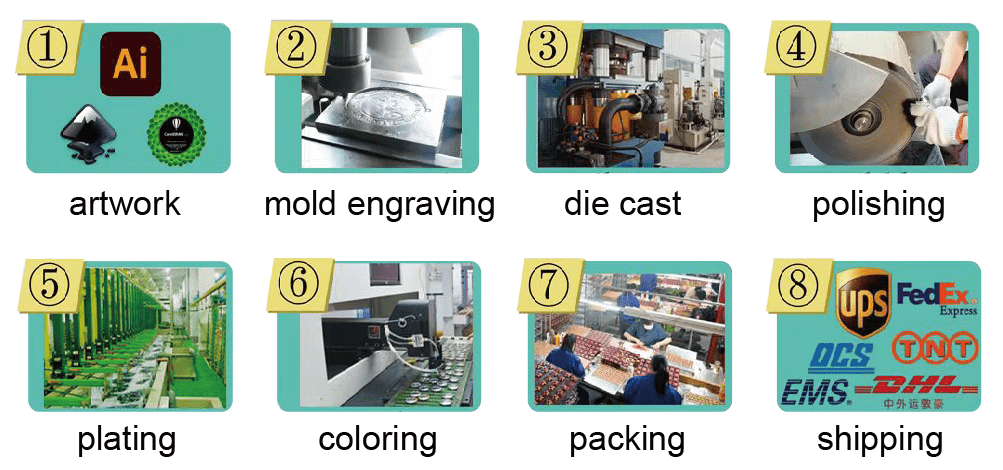
Engraving: Metal products can be engraved with a design or text using a laser or a rotary engraving machine.
Die-casting: This is a process where molten metal is poured into a mold or die to create a specific shape or design.
Stamping: Stamping involves pressing a design or text onto a metal coin using a stamp or a die.
Printing: Metal products can be printed using a process called screen printing or digital printing. This is a good option for adding full-color designs or photographs to a products.
Plating: Metal products can be plated with a layer of gold, silver, or other metals to give them a unique look.
How to guide for creating a product
You’ve decided you want a product, so now what?
You’ve never done this before. That’s OK, we have. It takes just three easy steps.
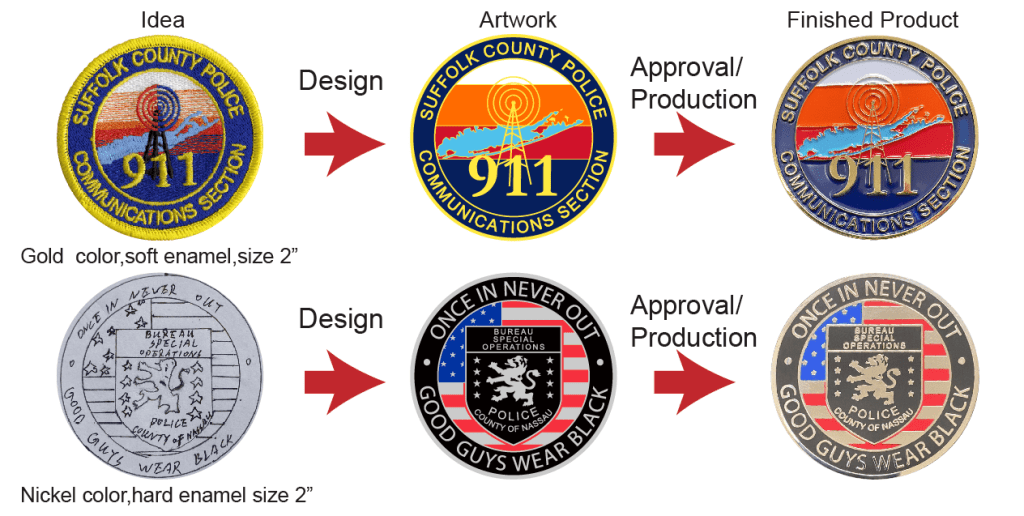
1,Tell us your idea
The first step is coming up with an idea. Think about what kind of
artwork you want on your products. Who are the products for, and what kind of events will they be a part of? What colors do you imagine?
Use resources like Google images, Pinterest, Instagram to find some inspiration. Once you have some ideas and images ready, share them with us, and write down a description of how you see the finished products.
Making a quick sketch is the best way to help us see what kind of artwork you have in mind. You don’t have to be a professional
artist. We just need to be able to see how you envision the general layout of the text and artwork in the products design.
2,Approve Your Proof
Once you’ve told us your idea, our team gets to work on the art. Using their expertise, specifications and craft to create a beautiful product design for you. We don’t charge for art or revisions. They will ensure that your products will look its best when produced based on the size and type of coin you are requesting.
3,Production & Delivery
Once you’ve approved the design, materials and quantity.
Then make the payment, and we can produce and send it to you.
How to disting soft enamel and hard enamel
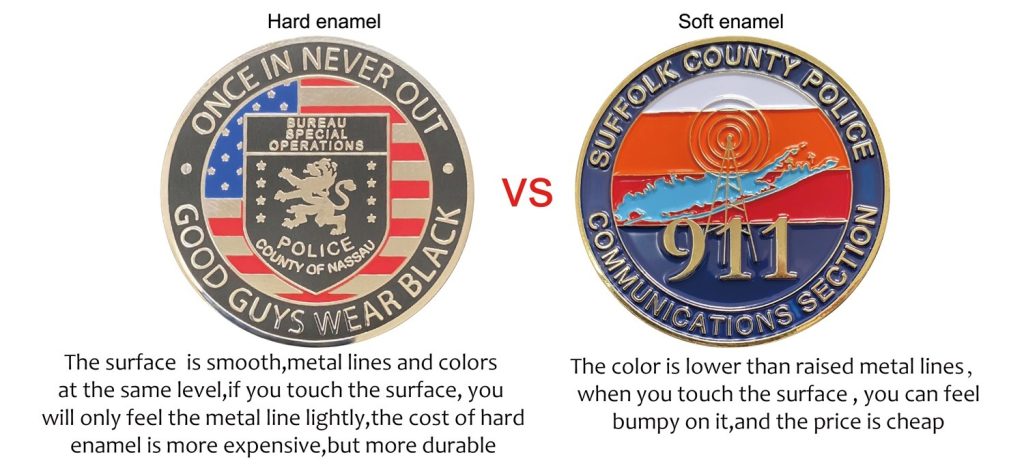
Actually, there is nothing either good or bad but thinking which one is more suitable to perform the feature of the product. If you don’t have enough budget,and you want to make a colorful badge with 3D sense, you can choose soft enamel.If you want a high quality and durable product, hard enamel will be your good choice.
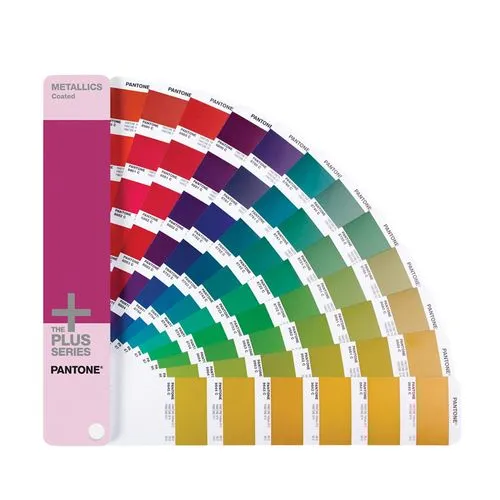
Pantone© Color Chart
The classic products style creates a formal look, suitable for any occasion or event. If you want to make your design even more memorable, especially for corporate products, add color.
We add color enamel to your design after the design is die struck into the metal. We fill in the recesses with enamel paint and cure the enamel at high heat. The end result is an attractive, durable design with dramatic visual appeal.
Because computer screens and mobile devices vary in how they display colors, we rely on Pantone® colors as our color guide.Be aware that the only way to ensure an EXACT color match by checking an actual physical copy of a Pantone (PMS) color chart at your print shop or public library. You can also check out our virtual Pantone© color chart for a close approximation on your screen.
